CONFIGURATION GUIDE
The purpose of the following manual is to describe the necessary configuration of 4ipnet equipment for integration with Octopus Platform.
| Panel | ||||||||||||
|---|---|---|---|---|---|---|---|---|---|---|---|---|
| ||||||||||||
|
1- Pre-requisites
If there is a firewall in the network that might block the traffic, you will need to allow access to some domains to enable user's authentication:
Radius Servers:
Primary: <IP_Radius_1> 1812 and 1813 UDP ports
Secondary: <IP_Radius_2> 1812 and 1813 UDP ports
Splash Portal server:
Domain <captive_portal_domain> 80 and 443 TCP ports
For the operation of the Guest and Enterprise modules configuration, it will be necessary to previously contract the Octopus platform licenses with the respective modules.
2- Guest module configuration
2.1 Radius Servers
Radius Authentication
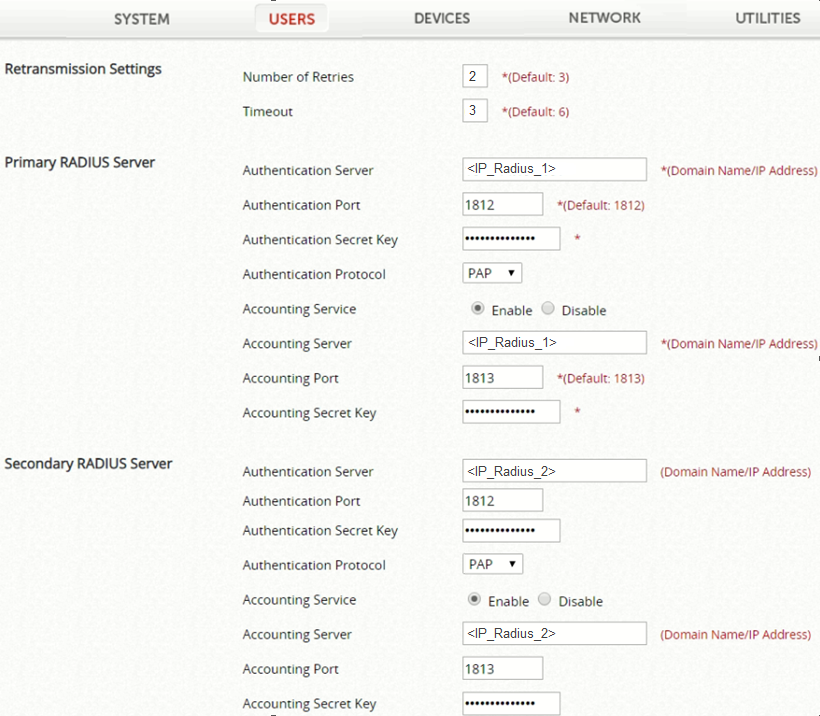
Now we will make the configuration of the Radius Servers for the validation of the users on the captive portal. First access to Users > External Authentication > RADIUS and edit the desired one with the following parameters:
NAS Identifier: FOURIPNET

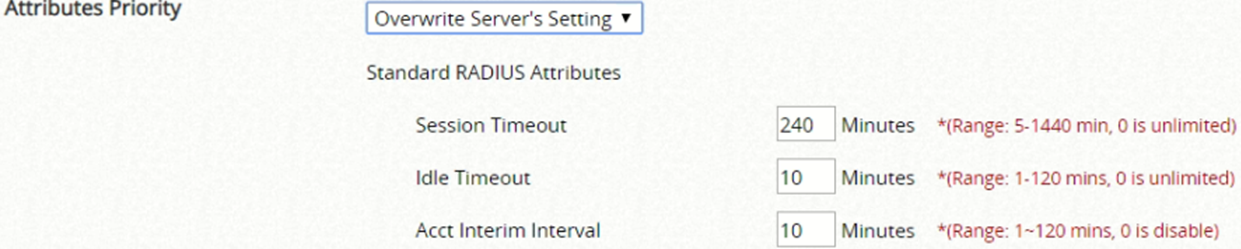
Attributes Priority:
Acct Interim Interval: 10 Minutes
Retransmission Settings:
Number of Retries: 2
Timeout: 3
Primary RADIUS Server:
Authentication Server: <IP_Radius_1>
Authentication Port: 1812
Authentication Secret Key: <Secret>
Authentication Protocol: PAP
Accounting Service: Enable
Accounting Server: <IP_Radius_1>
Acounting Port: 1813
Accounting Secret Key: <Secret>
Secondary RADIUS Server:
Authentication Server: <IP_Radius_2>
Authentication Port: 1812
Authentication Secret Key: <Secret>
Authentication Protocol: PAP
Accounting Service: Enable
Accounting Server: <IP_Radius_2>
Acounting Port: 1813
Accounting Secret Key: <Secret>
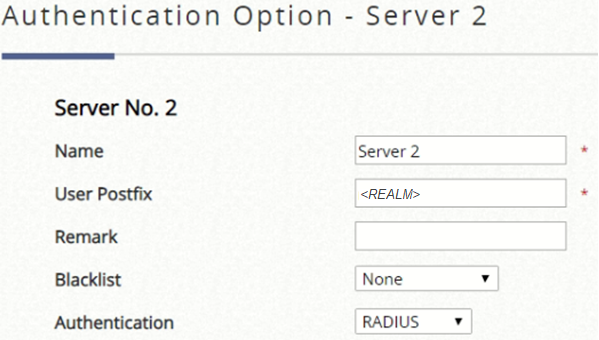
Authentication Server
It is neccessary to defined a Postfix with the name of the Realm associated to the WifiArea Locations inside of the platform, so the controller does not return the error Authentication Option (associated with the postfix) is not found.
To do this within the WiFi Platform, access WifiArea Configuration > WifiAreasOrganization to view the List of clients and obtain the REALM parameter of the WifiArea Locations in question.
Finally, access within the configuration of the manufacturer to Users > Authentication Servers and edit the server Authentication RADIUS:
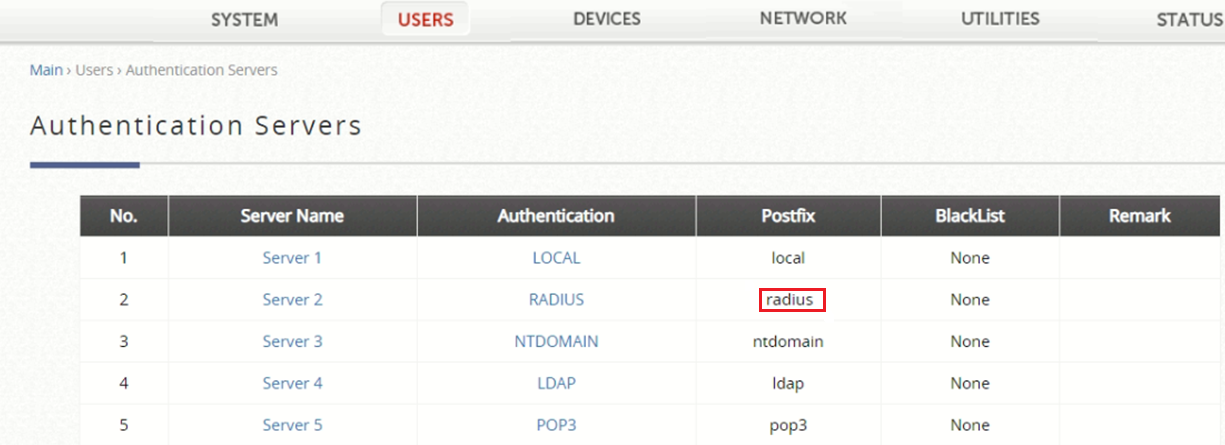
And fill with the following parameters:
User Postfix: <REALM>
2.2 Walled Garden
The next step is to add the domains to which the user will have free access before validating in the captive portal. To do this, go to Network > Walled Garden and click on Add Walled Garden List. Fill in the following parameters:
Domain Name/IP Address/URL: domain to be liberated
Walled Garden:
Active: Selected
Service Zone: Select the zone where the captive portal has been configured.
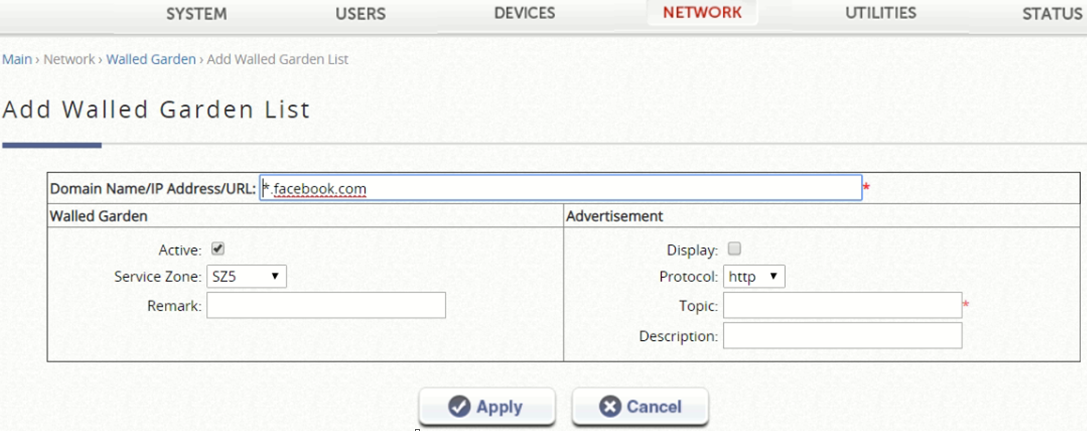
Finally click on Apply to save the changes.
| Info |
|---|
If you wish to add extra domains (Social Networks, Paypal, etc...) they can be consulted from the following link. |
2.3 HTTP or HTTPS login process configuration
There are two configuration options for the validation of the captive portal: One through http connectivity, where the traffic would not be encrypted, and the other through https.
HTTP option
Leaving default values, we can use this configuration.
HTTPS option
The controller has a built-in factory default certificate (gateway.example.com) that cannot be deleted, but it allows to upload new certificate. For that, access to Main Menu > Utilities > Certificate and edit the certificate System Certificate that is going to be used for the HTTPS login:
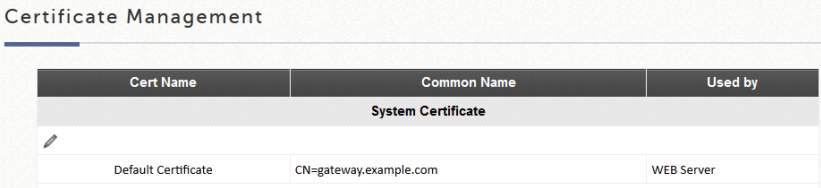
To upload the new certificate click on Browse and select the 3 files provided by the support team:
Certificate: certificate.crt
Private Key: certificate.key
Intermediate CA: certificate.ca.crt
To finish click on Upload Files.
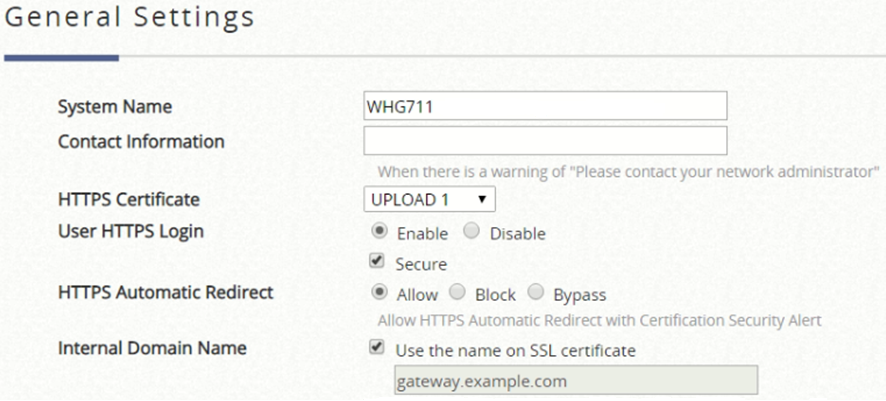
Finally, it is neccessary to select the certificate to use it in the login process. To do it access to General Settings and configure it with the following parameters:
HTTPS Certificate: name of the new certificate.
User HTTPS Login: Enable
Secure: Enable
Internal Domain Name: Enable Use the name on SSL certificate (It will change automatically when rebooting the controller)
Finally apply the changes and restart the controller:

To verify that all has been upload propertly, we can verify that the Internal Domain Name has change:

This subdomain associated with the certificate will resolve to the controller's management IP.
2.4 Authorized MAC Addresses
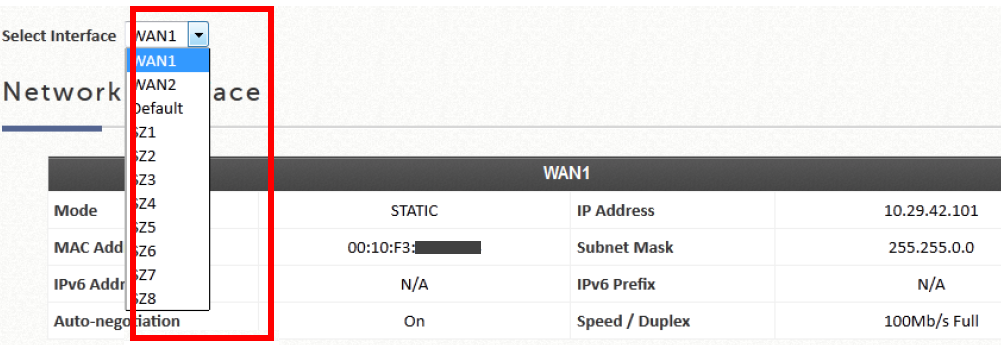
In order to allow the users to authenticate themselves in the captive portal correctly, it is necessary to identify the NAS that will send the authentication requests to the Radius Server. In this case, it is neccessary to add the MAC WAN of the controller. To obtain it access Status > System Summary > System Report and select the WAN Interface of the internet output to get theMAC Address: