CONFIGURATION GUIDE
The purpose of the following manual is to describe the necessary configuration of Fortiwifi equipment for integration with Octopus Platform
| Panel | ||||||||||
|---|---|---|---|---|---|---|---|---|---|---|
| ||||||||||
|
1- Pre-requisites
If there is a firewall in the network that might block the traffic, you will need to allow access to some domains to enable user's authentication:
Radius Servers:
Primary: <IP_Radius_1> 1812 and 1813 UDP ports
Secondary: <IP_Radius_2> 1812 and 1813 UDP ports
Splash Portal server:
Domain <captive_portal_domain> 80 and 443 TCP ports
For the operation of the Guest and Enterprise modules configuration, it will be necessary to previously contract the Octopus platform licenses with the respective modules.
2- Guest module configuration
2.1 Radius Servers
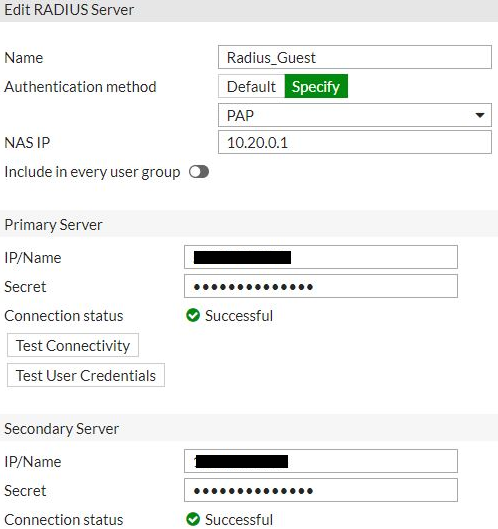
First of all, to configure the external captive portal in a SSID, it is necessary to set up the Radius Server that the user's authentication requests will be sent to. Go to the section User & Device > RADIUS Servers and add a new Radius Server with the following configuration:
Name: Radius_Guest
Authentication method: Specify, PAP
Primary Server IP/Name: <IP_Radius_1>
Primary Server Secret: <Secret>
Secondary Server IP/Name: <IP_Radius_2>
Secondary Server Secret: <Secret>
Once the Radius Server configuration has been added, it is necessary to create the user group that will use this server. Go to the section User & Device > User Groups and add a new group with the following parameters:
Name: Group_Radius
Type: Firewall
Remote Groups: add the Radius Server that has been configured before.

Once the Radius Server has been added, it is necessary to SSH into the Fortinet machine and execute the following code to activate the Accounting Server.
| Code Block | ||
|---|---|---|
| ||
config user radius edit "Radius_Guest" set acct-interim-interval 600 config accounting-server edit 1 set status enable set server <IP_Radius_1> set secret <Secret> set port 1813 next end next end |
To enable HTTPS authentication access the Fortinet device via SSH or console and execute the following commands:
| Code Block | ||
|---|---|---|
| ||
config user setting set auth-secure-http enable end |
2.2 Captive Portal
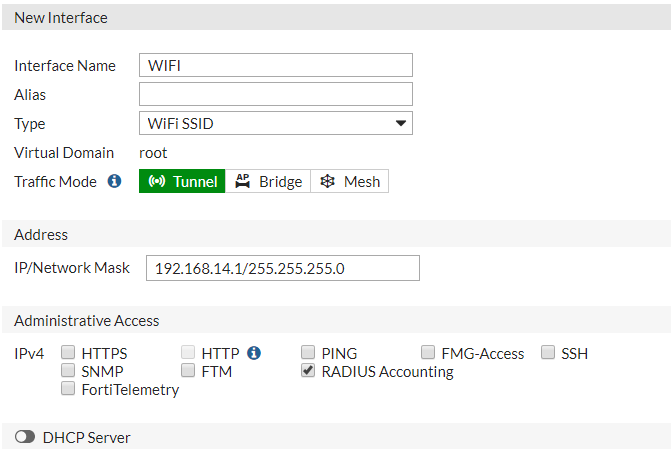
The next step is to add the WLAN that will be linked to the external captive portal. Go to the section WiFi & Switch Controller > SSID and click on Create New SSID to add a new WLAN. Then, perform the following configuration:
Interface Name: type the interface name
Type: WiFi SSID
Traffic Mode: Tunnel
Address: set up the IP address configuration depending on the client's network parameters.
Administrative Access: RADIUS Accounting
DHCP Sever: set up the DHCP server configuration depending on the client's network parameters.
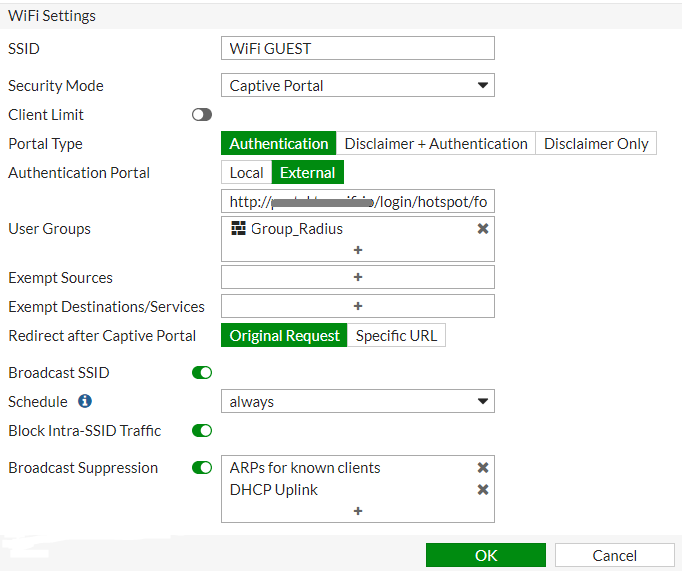
WiFi Settings
SSID: SSID name that will be visible to the wireless users.
Security mode: Captive Portal
Portal Type: Authentication
Authentication Portal: External → https://<captive_portal_domain>/login/hotspot/fortiwifi
User Groups: select the user group which is linked to the Radius Server, Group_Radius
Redirect after Captive Portal: Original Request
2.3 Walled Garden
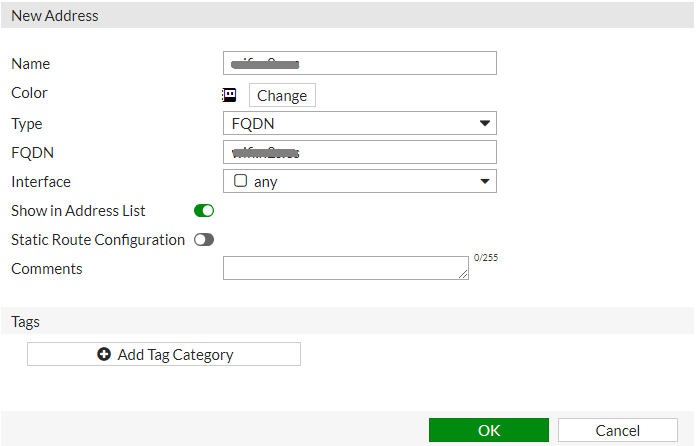
To configure the domains to which users will have free access before validation go to Policy & Objects > Addresses and add a new Address with the following configuration:
Name: <captive_portal_domain>
Type: FQDN
FQDN: <captive_portal_domain>
Interface: any
Repeat the process to add a new Address for each of the domains required for the operation of the captive portal depending on the validation methods chosen:
| Info |
|---|
If you wish to add extra domains (Social Networks, Paypal, etc...) they can be consulted from the following link. |
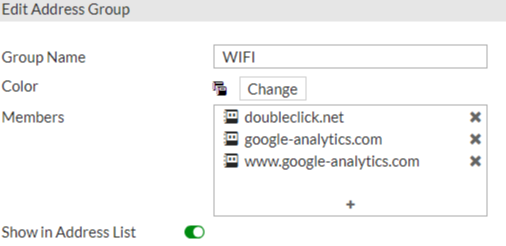
Then you need to create an Address Group that includes all of the above domains. To do this, click on Create New Address Group and configure the following parameters:
Name: WIFI
Members: include all previously added domains.
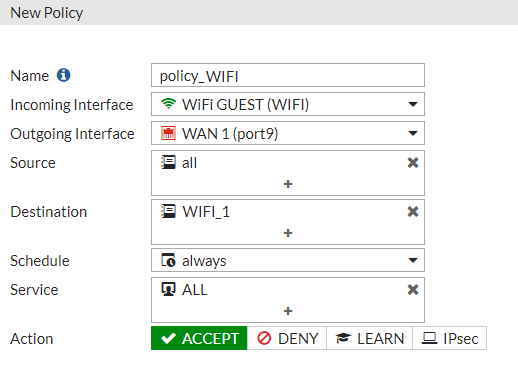
Once all the addresses have been added, it is necessary to associate each one of them with a specific policy. To do this, go to Policy & Objects > IPv4 Policy and add a new policy with the following configuration:
Name: policy_WIFI
Incoming Interface: the SSID configured
Outgoing Interface: WAN Interface
Source: all
Destination: select the domain names added before
Service: ALL
Action: Accept
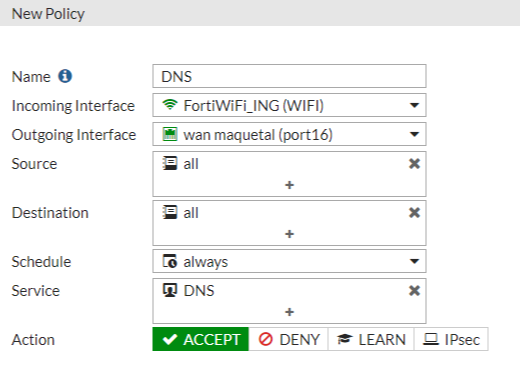
In addition, it is required to add a policy that allows access to the DNS servers. So add a new policy and perform the following configuration:
Name: DNS
Incoming Interface: select the SSID you have configured previously.
Outgoing Interface: WAN Interface
Source: all
Destination: all
Service: DNS
Action: Accept
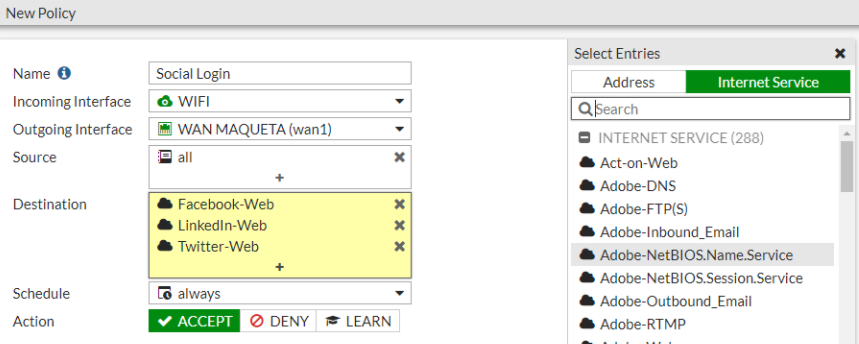
If you are going to enable WifiArea validation via social networks you will also need to add the following policy.
Name: Social Login
Incoming Interface: SSID configurado
Outgoing Interface: WAN Interface
Source: all
Destination: add the pre-configured Internet Services in the Fortinet depending on the social network (Facebook-Web, Linkedin-Web, Twitter-Web)
Action: Accept
The next step is to enable the bypass of the Walled Garden policies so that it is not affected by the configured external captive portal. To do this, access the equipment through the console and execute the following code, changing the policy_id for the corresponding one.
| Code Block | ||
|---|---|---|
| ||
config firewall policy
  edit <policy_id>
    set captive-portal-exempt enable
  end
|
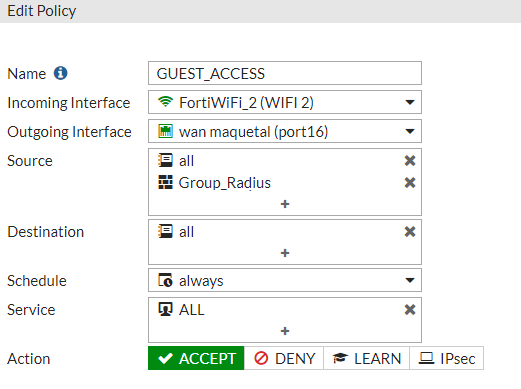
To finalize this configuration, an Internet access policy must be created for authenticated users with the following configuration:
Name: GUEST_ACCESS
Incoming Interface: select the SSID you have configured previously.
Outgoing Interface: WAN Interface
Source:
all
add the user group linked to the Radius Server.
Destination: all
Service: ALL
Action: Accept
2.4 Authorized MAC Addresses
For user validation to work properly it is necessary to identify the NAS that will be able to make authentication requests to the Radius Server. In this case it is necessary to add the MAC address of each AP and the MAC addresses assigned to the WiFi interface of the APs in which the SSID will be radiated with the captive portal in both 2.4GHz and 5GHz.
To check these MAC addresses, it is necessary to access the Fortinet through SSH and execute the following command inside the corresponding VDOM:
| Code Block | ||
|---|---|---|
| ||
diagnose wireless-controller wlac -d all |
The MAC assigned to the WiFi interface on both 2.4GHz and 5GHz of each configured SSID should be added.

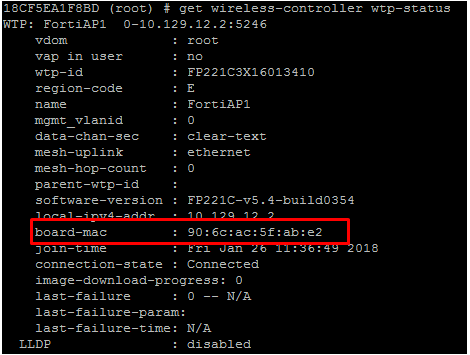
By the way, to find out the AP MAC address, execute the following command:
| Code Block | ||
|---|---|---|
| ||
get wireless-controller wtp-status |
In this case, the board-mac address of each AP must be added.
| Info |
|---|
For information on how to add the MAC address of each AP as an authorized NAS on the platform, please refer to the following link /wiki/spaces/SOP/pages/1114243195location |
3- Enterprise module configuration
In order to integrate the configurations of this module with the platform, it is necessary to contract the Octopus Wifi Enterprise Module.
3.1 MAC Authentication
To enable MAC authentication it is necessary to edit the created SSID Profile. To do this, it is necessary to access the equipment through SSH or console and execute the following commands indicating the name of the corresponding SSID profile.
| Code Block | ||
|---|---|---|
| ||
config wireless-controller vap edit <name> set mac-auth-bypass enable next end |
----
| Info |
|---|
Validation via the MAC address of the devices or MAC Authentication can only be activated if the FortiWiFi equipment has FortiOS version 6.0.0 or higher. |
3.2 Configuration of “Access Profiles” funtionality in the Octopus Platform
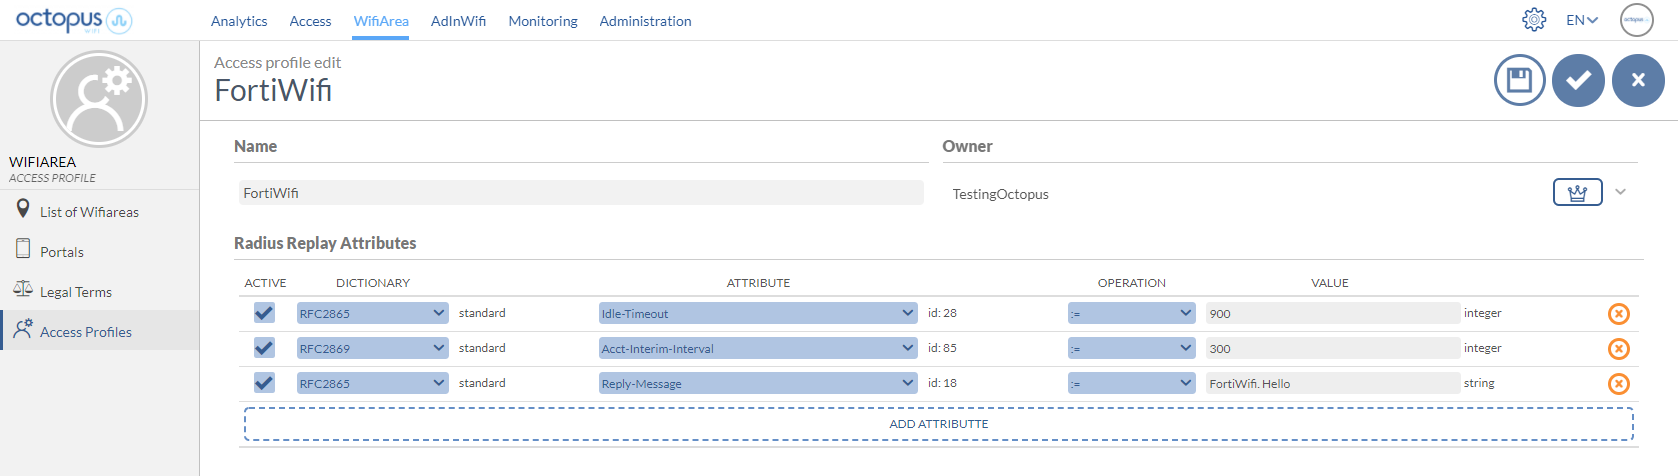
Through the Octopus platform it is possible to configure a series of reply attributes of the Access-Accept packages, grouped in the so-called Access Profile. These Access Profiles allow to activate a series of functionalities in the Fortiwifi Although the most common and proprietary Fortiwifi radius dictionaries are available, the following is a list of some of the most interesting ones:
Atributo | Descripción | Format |
|---|---|---|
Idle-Timeout | Maximum inactivity time. If the user does not transfer any data on the network during this time, the session will be terminated and the user will have to re-authenticate. | Seconds |
Acct-Interim-Interval | Defines the time interval at which the NAS sends the accounting packet update with all the user's session information. | Seconds (minimun 600 seconds) |
Reply-Message | Useful for troubleshooting functions, since it allows to identify associated elements of the Octopus platform, such as an access profile, access method, location, ... |
Example of an Access Profile configuration with the attributes explained above:
| Info |
|---|
For more information on how to create an Access Profile in Octopus Platform go to /wiki/spaces/SOP/pages/1963492399 Access profiles |